1. Understanding What a Garbage Disposal Does
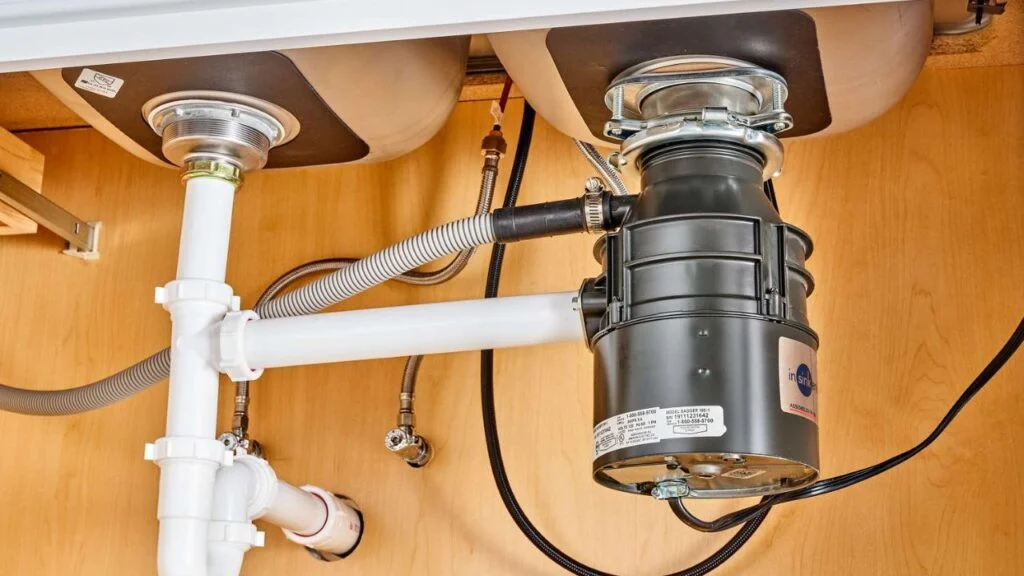
A garbage disposal is a small but powerful appliance that sits under your kitchen sink, connected to the drain and powered by electricity. Its main job is to grind food waste into tiny particles that can safely pass through your plumbing system, reducing kitchen odors and waste.
Installing a garbage disposal not only keeps your kitchen cleaner but also helps the environment by reducing landfill waste. Modern models are designed to be energy-efficient, quiet, and easy to maintain. Whether you’re upgrading an old unit or installing a new one for the first time, this guide will help you complete the process safely and efficiently.
2. Tools and Materials You’ll Need
Before you start, make sure you have all the necessary tools and supplies Utility Pipe Supply on hand. Installing a garbage disposal is usually a DIY-friendly project, but being well-prepared makes the job much easier.
You’ll need:
-
A new garbage disposal unit
-
Plumber’s putty
-
Screwdriver set (flathead and Phillips)
-
Adjustable wrench or socket set
-
Pipe wrench
-
Bucket or container
-
Electrical tape and wire nuts
-
PVC pipe kit (if replacement is needed)
-
Safety gloves
Optional but useful: plumber’s tape, flashlight, and a helper if it’s your first time doing plumbing work.
3. Removing the Old Disposal or Sink Drain
If you already have a garbage disposal or standard sink drain, it needs to be removed before installing the new one. Start by unplugging the old unit or turning off the circuit breaker that powers it to ensure safety.
Steps to remove the old disposal:
-
Disconnect the power supply – unplug or remove the hardwired connection.
-
Place a bucket under the sink to catch any water that may spill.
-
Loosen and disconnect the drain pipe and dishwasher hose (if connected).
-
Unlock the mounting ring by turning it counterclockwise – the old disposal will drop off the sink flange.
-
Clean the sink opening thoroughly before installing the new unit.
If your sink has no disposal currently, remove the old drain flange and apply plumber’s putty to prepare for the new flange installation.
4. Installing the Mounting Assembly
Every garbage disposal comes with a mounting assembly that secures it to the bottom of your sink. This part is crucial for a leak-free, stable installation.
Here’s how to install it:
-
Roll a small bead of plumber’s putty around the sink drain opening.
-
Insert the sink flange into the hole and press it down firmly.
-
Under the sink, place the fiber gasket, backup ring, and mounting ring in the correct order.
-
Tighten the mounting screws evenly until snug – do not overtighten, as it could damage the sink.
-
Wipe away any excess plumber’s putty that squeezes out.
Once installed, the mounting assembly provides a secure connection for your garbage disposal to lock into place.
5. Attaching and Wiring the Garbage Disposal
Now comes the key step — connecting and powering the garbage disposal. If your unit is plug-in, simply ensure there’s an outlet nearby. If it’s hardwired, follow these instructions carefully:
Electrical connection:
-
Remove the wiring cover plate on the disposal.
-
Connect the black (hot) and white (neutral) wires using wire nuts.
-
Connect the green grounding wire to the green screw or grounding clip.
-
Replace the cover plate and secure the wiring.
Mounting the disposal:
-
Align the disposal under the sink and insert it into the mounting ring.
-
Turn it clockwise until it locks into place.
-
Reconnect the drain pipe and dishwasher hose if applicable.
-
Use PVC adapters or compression fittings to ensure a watertight seal.
Before running it, double-check all connections — both electrical and plumbing — to avoid leaks or shorts.
6. Testing and Final Adjustments
Once the garbage disposal is installed and wired, it’s time to test it for leaks and performance.
Follow these steps:
-
Turn on the water and let it run for 1–2 minutes.
-
Check for leaks under the sink, especially around the mounting assembly and drain connections.
-
Plug in or switch on the disposal power.
-
Run cold water while turning on the disposal to check if it grinds smoothly.
If the unit vibrates excessively or makes unusual noises, ensure it’s mounted securely and no foreign objects are inside.
Pro Tip: Always run cold water while using your garbage disposal — it helps solidify grease, making it easier for the blades to break down waste efficiently.
Conclusion
Installing a garbage disposal is a straightforward project that can upgrade your kitchen’s cleanliness and functionality. With the right tools, safety precautions, and step-by-step approach, you can complete the job in less than two hours — even if you’re a beginner.
Whether you’re replacing an old unit or setting up a new one, the key to success lies in secure mounting, tight seals, and proper wiring. Once installed, your garbage disposal will make kitchen cleanup faster, easier, and more eco-friendly for years to come.