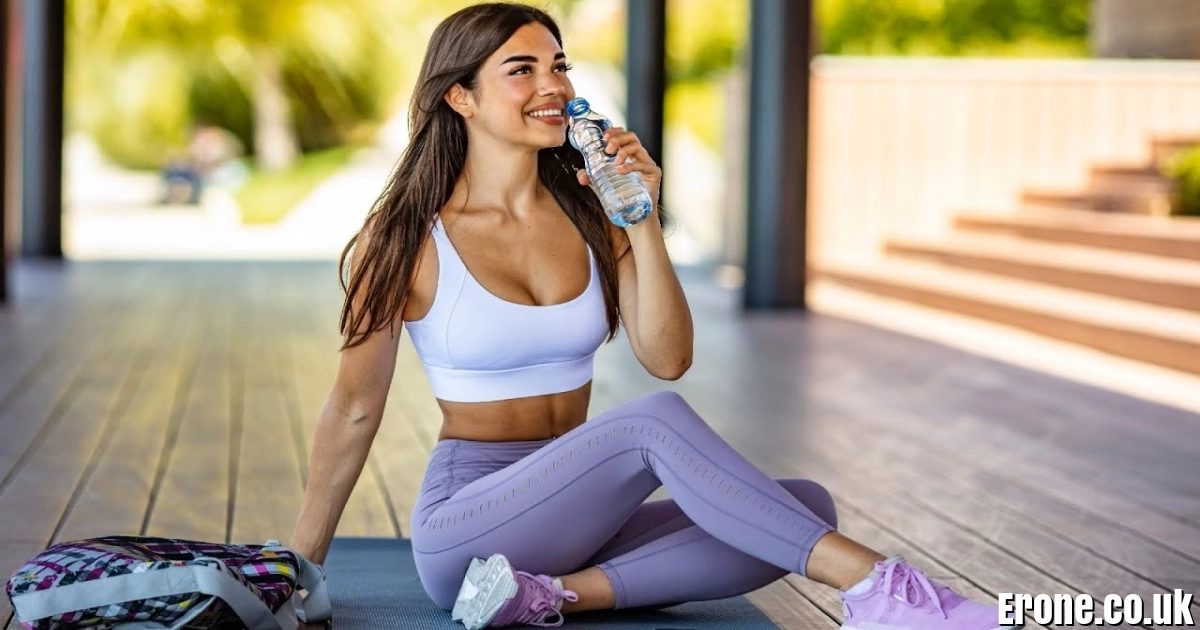
FITNESS
Hugh Jackman Workout & Diet: The Wolverine Workout – Tymoff
When people search for “hugh jackman workout & diet: the wolverine workout – tymoff”, they’re often looking for the exact blueprint the Hollywood star followed to transform into one of the most iconic superheroes on screen. Hugh Jackman’s portrayal of Wolverine wasn’t just about acting chops—it was about a ripped, powerful, and lean physique built through years of training discipline, carefully structured nutrition, and an elite fitness strategy that any dedicated person can learn from.
This article breaks down his workout routine, diet strategy, and the principles behind the Wolverine transformation, so you can take inspiration for your own fitness goals.
The Origins of the Wolverine Workout
Hugh Jackman Workout & Diet: The Wolverine Workout – Tymoff
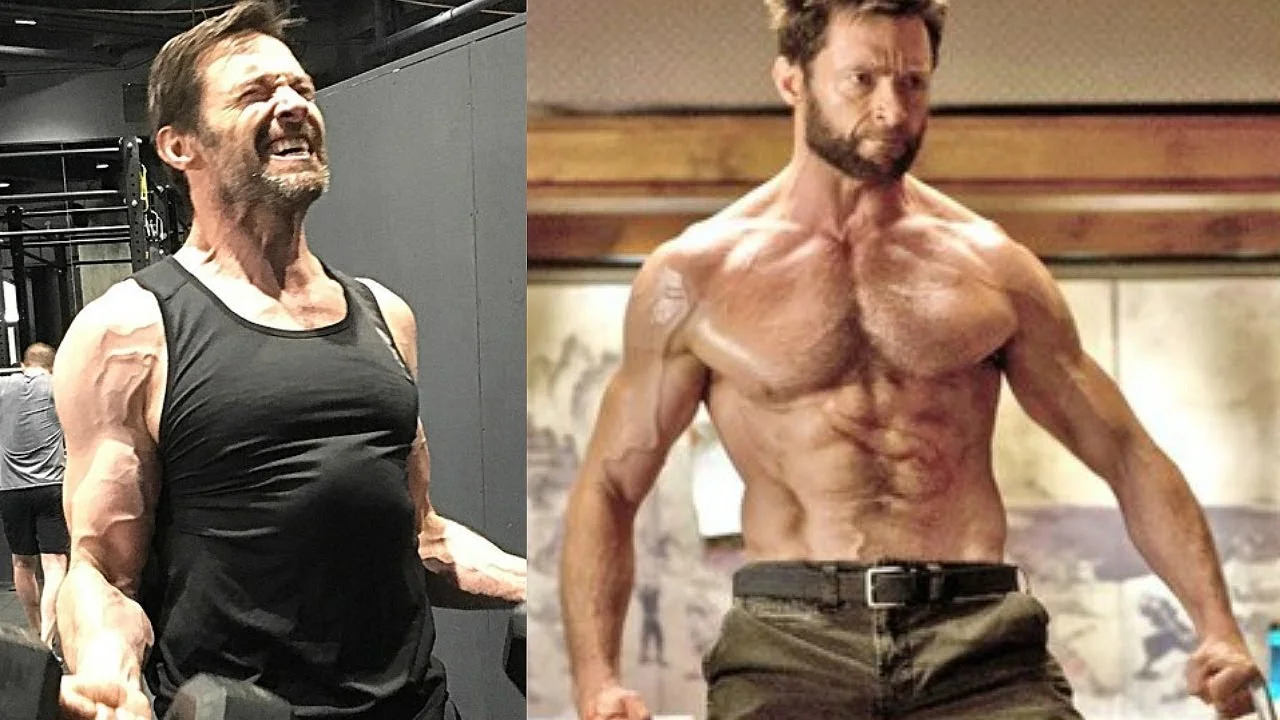
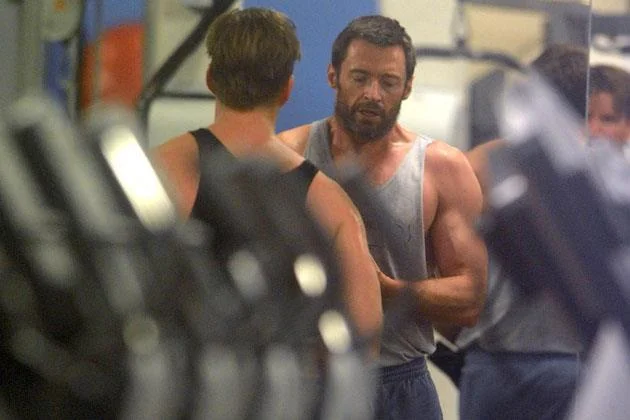
When Hugh Jackman first signed on to play Wolverine in the early 2000s, he was in great shape—but nothing compared to the muscular, vascular, superhero body he achieved in films like The Wolverine, Logan, and Deadpool & Wolverine.
The so-called “Wolverine Workout – Tymoff” refers to the documented training and diet system that became widely discussed in fitness communities and platforms. At its core, Jackman’s transformation revolved around:
-
Strength training with compound lifts like deadlifts, squats, and bench press.
-
Periodization cycles (progressively heavier loads followed by deload weeks).
-
Hypertrophy accessory work for arms, chest, and shoulders.
-
Cardio conditioning for fat loss and stamina.
-
A calorie-controlled diet that alternated between bulking and cutting phases.
Jackman worked with world-class trainers and nutritionists, but the blueprint is surprisingly straightforward, relying on classic gym lifts and strategic eating.
The Wolverine Workout Structure
The foundation of the hugh jackman workout & diet: the wolverine workout – tymoff plan is heavy, progressive resistance training. His program was divided into four-week cycles to build both strength and muscle.
Main Exercises
-
Deadlift
-
Barbell Squat
-
Bench Press
-
Weighted Pull-Ups / Chin-Ups
Progressive Overload System
-
Week 1: 5 reps at 60–75% of 1RM
-
Week 2: 4 reps at 65–85% of 1RM
-
Week 3: 3 reps at 70–90% of 1RM
-
Week 4: Deload with 10 reps at 40–60%
After each block, he would increase the max weight by 5–10% and repeat the cycle.
Accessory Work
To carve detail into his physique, he added exercises like:
-
Dumbbell shoulder presses
-
Cable rows and pullovers
-
Lateral raises & face pulls
-
Barbell curls and triceps pushdowns
This combination ensured strength, size, and definition—a complete superhero build.
Cardio & Conditioning for Wolverine-Level Fitness
Jackman’s workout wasn’t just about lifting heavy—it also involved serious cardio conditioning. To play Wolverine, he had to look lean while staying agile for stunt work.
-
Post-Workout Cardio: 20–30 minutes of rowing, treadmill runs, or sled pushes.
-
HIIT Sessions: High-intensity intervals for fat burning during cutting phases.
-
VO2 Max Training: His cardiovascular endurance was tested to be at 59 ml/min/kg, a level considered elite for athletes, even those much younger than him.
This cardio strategy ensured Jackman stayed shredded without losing muscle mass, a critical balance for superhero aesthetics.
The Wolverine Diet – Bulking and Cutting Phases
Hugh Jackman Workout & Diet: The Wolverine Workout – Tymoff
Of course, no discussion of hugh jackman workout & diet: the wolverine workout – tymoff is complete without covering the nutrition strategy. Jackman has openly admitted that eating enough was harder than the workouts themselves.
Bulking Phase (4,500–8,600 Calories Daily)
When preparing to gain muscle, Jackman reportedly consumed up to 8,600 calories a day, spread across six meals. His meals were packed with:
-
Lean proteins: chicken, fish, grass-fed steak
-
Complex carbs: brown rice, sweet potatoes, oats
-
Healthy fats: avocado, nuts, olive oil
-
Supplements: whey protein shakes and BCAAs
Cutting Phase (3,500 Calories Daily)
As filming approached, his diet switched to a calorie deficit with an emphasis on protein for muscle preservation.
-
Carb cycling was introduced—carbs were eaten mostly before training and reduced later in the day.
-
Meals became smaller but more frequent to keep metabolism firing.
-
Cheat meals were minimal; Jackman was known for strict adherence to the plan.
The result? A vascular, shredded physique that became one of the most recognized superhero bodies in Hollywood.
Discipline, Teamwork, and Work Ethic
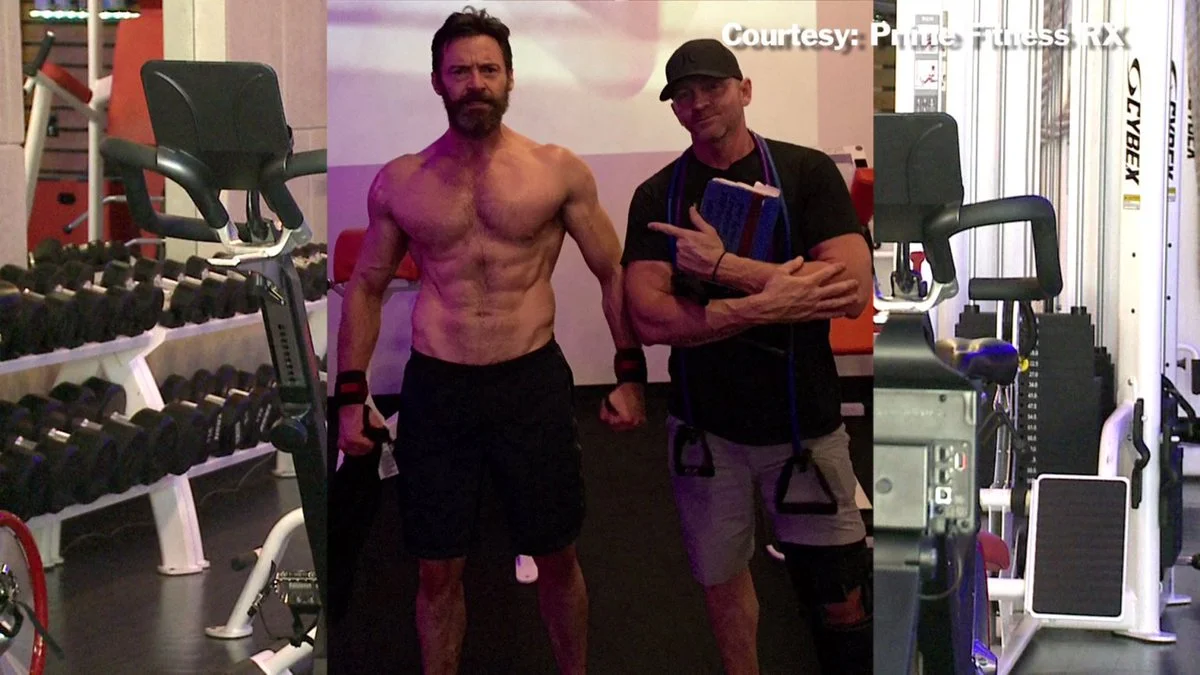
Jackman has repeatedly said that Wolverine’s physique wasn’t achieved by him alone—it took a team of trainers, nutritionists, and chefs working around the clock. Reports suggest he had eight people dedicated to his transformation, ensuring meals were prepped, workouts were tracked, and recovery was optimized.
His work ethic, however, was the true secret weapon. On set, he once performed 800 push-ups in a single day to maintain a pump for shirtless scenes. That level of commitment separated him from average actors and cemented Wolverine as one of the greatest superhero physiques ever captured on screen.
How You Can Apply the Wolverine Workout
While most people don’t have Hollywood budgets or chefs, you can still apply the principles of the Wolverine workout to your own routine:
-
Lift Heavy & Track Progress: Focus on squats, deadlifts, bench press, and pull-ups.
-
Use Periodization: Train in cycles—3 weeks heavy, 1 week deload.
-
Eat Clean, Eat Enough: Use bulking and cutting phases strategically.
-
Prioritize Recovery: Sleep 7–9 hours per night and hydrate well.
-
Stay Consistent: The Wolverine body wasn’t built overnight—it was years of dedication.
By following this blueprint, you won’t just look better—you’ll feel stronger, move better, and unlock superhero-level fitness potential.
Conclusion
The keyword hugh jackman workout & diet: the wolverine workout – tymoff has become popular because people are fascinated by how an actor in his 40s and 50s achieved one of the most jaw-dropping physiques in Hollywood. The answer lies in structured training, strict nutrition, and unshakable discipline.
Jackman’s Wolverine workout proves that with the right mindset and plan, anyone can push their body to new limits. It’s not magic—it’s method, sweat, and consistency.
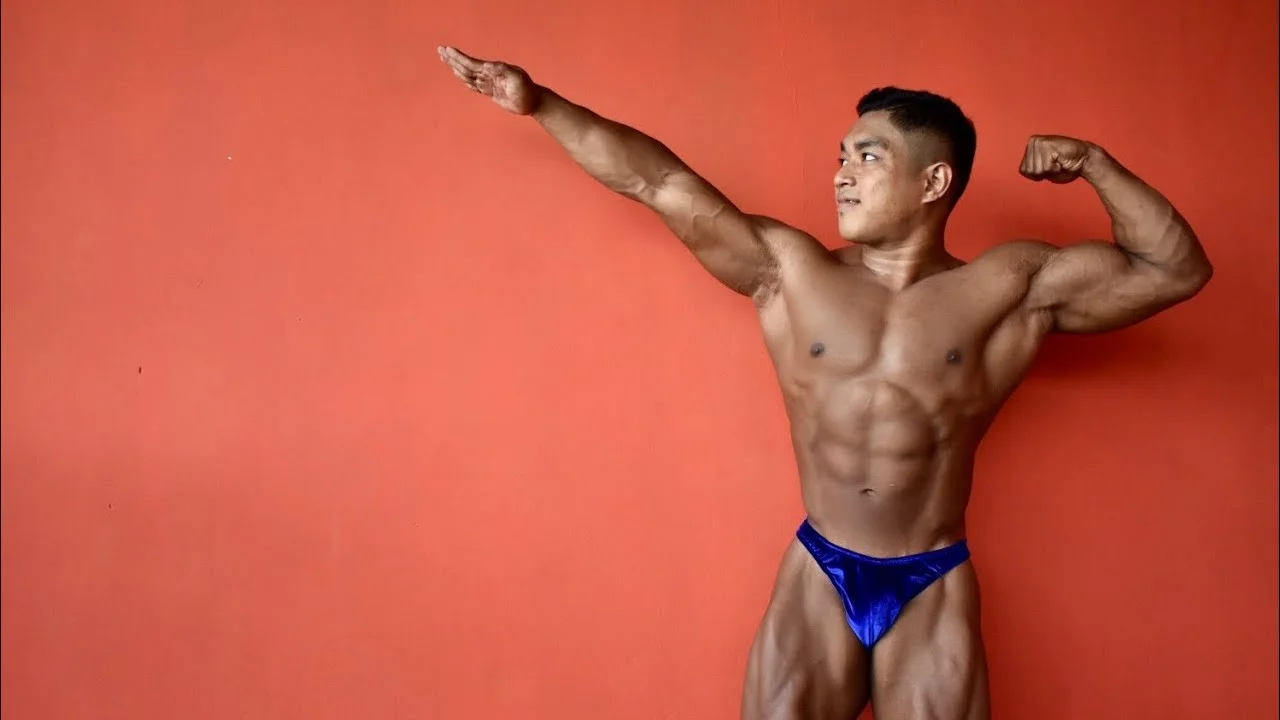
Posing Trunks Bodybuilding Mend Gold Lama’: In men’s bodybuilding competitions, posing trunks are the minimal briefs athletes wear during the physique and bodybuilding rounds. They are designed to showcase muscular definition, symmetry, and aesthetics while maintaining modesty.
The (hypothetical) Gold Lama line (or “Mend Gold Lama”) might refer to a premium brand or model of posing trunks — perhaps distinguished by metallic accents, luxury fabrics, or unique cuts. In this article, “Gold Lama posing trunks” serves as an exemplar of high-end performance trunks.
Posing trunks typically differ from regular swim shorts or underwear by their cut, stretch, color, and finish. Let’s explore the criteria, design features, rules, and care tips that matter to competitive bodybuilders.
Design & Construction: What Makes Premium Posing Trunks
When designing or choosing premium posing trunks like “Gold Lama,” several factors matter:
Cut & Coverage
- The trunks must provide sufficient front and rear coverage to comply with contest rules, yet cut high on the hips to elongate the legs visually.
- The waistband should sit low on the hips (but not too low) to expose the glute sweep without sliding.
Fabric & Stretch
- A blend of nylon, spandex (elastane), and microfiber is common, offering four-way stretch so the trunks hug contours without wrinkling or puckering.
- Some premium trunks include metallic or satin finishes, glitter threads, or mesh inserts for visual flair (which a “Gold Lama” style might emphasize).
- Fade resistance and chlorine/sweat resistance are critical, since stage lighting, tanning, and oils will challenge fabric durability.
Color & Aesthetics
- Conventional colors are black, navy, or dark jewel tones, which help shadows and definition.
- High-end lines may offer metallic gold accents, reflective trims, or patterned textures — a “Gold Lama” style might highlight gold stitching or branding.
- Seam placement, edge binding, and stitching quality must be precise and low-profile to avoid distracting bulges.
Support & Elasticity
- Good trunks include strong elastic waistbands and leg bands that maintain tension without rolling.
- Some include an internal liner or double-layered crotch for modesty and better fit — especially when judges lean over or angles change.
If “Gold Lama” is real, its distinguishing features would likely leverage high-quality fabrics, metallic finishes, and aesthetic design while maintaining stage-compliant cut and durability.
Competition Rules & Compliance
No matter how beautiful trunks are, they must comply with the competition rules. Use of noncompliant trunks may lead to deductions or exclusion.
IFBB / NPC / National Federation Rules
- Coverage: The trunks must cover the glutes fully; excessive cheek exposure is often penalized.
- Line & Seam Position: Back seam must align with the glute crease; side seams should hug the hips without flaring.
- Color / shine restrictions: Some federations limit high gloss or metallic finishes — trunks should not reflect excessively or detract from muscular definition.
- Fit & Wrinkle: Trunks must fit snugly without sagging, loose fabric, or wrinkles under posing stress.
- Modesty in mandatory poses: During required poses, judges must see muscles without obstruction; trunks should not hinder that view.
When designing or purchasing high-end trunks like “Gold Lama,” verifying that they meet the rules of your federation (e.g. NPC, IFBB Pro, WNBF) is essential.
Why Choose Premium / Luxury Trunks (e.g. “Gold Lama”)
What advantages might a brand like Gold Lama offer over budget trunks?
Better Aesthetics & Stage Presence
- High-end fabrics and metallic accents can catch stage lighting to accentuate muscle definition under lights.
- Precise cuts and tailored fit reduce distractions and improve visual symmetry on stage.
Durability & Longevity
- Premium trunks use high-grade elastics, strong stitching, and colorfast fabrics, making them more resilient to tanning sprays, oils, and repeated use.
- Edge bindings, reinforced seams, and quality materials resist rolling or sagging over time.
Comfort & Fit Under Pressure
- A refined fit, smooth seams, and ergonomic cuts reduce chafing or pinching during posing routines.
- Superior stretch ensures trunks move with the body, not against it.
Confidence & Branding
- Wearing a visually appealing piece (e.g. gold accents) can boost competitor confidence and branding image.
- Some athletes may sponsor or promote premium posing wear — a brand like Gold Lama gives a distinguished stage look.
But premium trunks must still respect regulatory constraints; flashy design is no substitute for fit and compliance.
Care, Maintenance & Longevity of Posing Trunks
Even the best trunks degrade unless properly cared for. Here’s how to maintain trunks like “Gold Lama” for maximum life.
Rinsing & Cleaning
- After each use, rinse trunks in cold water to remove tanning products, oils, sweat, and chalk.
- Use a mild detergent (no bleach or fabric softeners) for deeper cleaning between contests.
- Hand-wash is preferable; avoid washing machines, as agitators and spin cycles can damage elastic.
Drying
- Air dry in shade — never use direct sun or strong heat (e.g. dryers), which degrade elastics and fade colors.
- Lay flat or hang to keep shape; avoid pinching with clothespins that could mar fabric.
Storage
- Store flat or folded; avoid cramming trunks in tight spaces that distort stretch.
- Keep away from harsh chemicals, perfumes, or oils that may degrade elastic or fabrics over time.
Maintenance Checks
- Before every show, inspect seams, elastic bands, and edge bindings for signs of wear.
- Replace trunks if elasticity weakens or fabric integrity falters. A failing trunk is more harmful to stage performance than showmanship style.
A well-maintained top-tier trunk like Gold Lama will last through multiple contests and seasons.
Style, Fit Tips & Visual Tricks for Posing Trunks
To maximize appearance on stage — especially using a premium style — consider the following tips:
Fit & Tailoring Adjustments
- Ensure the waistband lies flat across the hip bone, not cutting the midsection line.
- Leg cut should reveal as much quad sweep as allowed without exposing the hamstring too much.
- Use slight adjustments (e.g. shifting trunks subtly) to align seams with optimal muscle lines.
Color & Contrast Strategy
- Dark trunks help hide skin imperfections under tanning; gold or metallic accents must be subtle so they highlight, not distract.
- Contrast trim or stitching (e.g. gold lines on black) can help define waistline or edges, enhancing symmetry.
Stage Lighting Considerations
- Metallic or shimmer fabrics may reflect stage lights; test trunks under competition lighting beforehand.
- Avoid trunks that reflect too much — they may wash out muscle shading. Use matte or semi-matte finishes where possible.
Coordination with Tanning / Oil / Skin Tone
- Match trunk color contrast to your tan depth; a too-light trunk against deep tan may stand out too sharply.
- Some athletes use oil or sheen to create highlights; premium trunks may hold shape better under such treatments without sagging.
Posing & Movement Integration
- During movement or transitions, trunks must not shift or gape — high-quality elastic and fit prevent that.
- View trunks at multiple angles (front, three-quarter, back) during practice to ensure no seam misalignment or fold shows.
By combining style, fit, and practical adjustments, a premium trunk like the Gold Lama design can be a visible advantage.
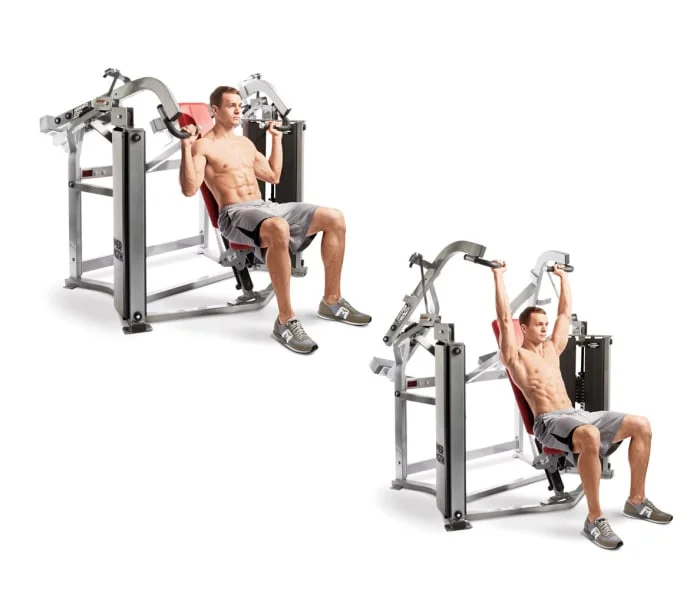
The shoulder press machine is a staple in many gyms. If used correctly, it builds strength in your shoulders, supports joint health, and helps with posture and functional movement. But like any exercise, doing it poorly or overdoing it can lead to injury. Below are six major angles to understand the shoulder press machine fully: what it is, how to use it, what muscles it works, benefits vs drawbacks, common mistakes & how to avoid them, and programming tips to use it effectively.
What Is the Shoulder Press Machine?
The shoulder press machine is a piece of gym equipment (often seated) that allows you to press handles or a bar overhead in a guided, fixed path. It mimics the overhead press/lift (sometimes called overhead or military press) but adds more structural support.
Key features:
-
Fixed plane of motion: The machine guides your arms along a predetermined path, reducing the need for stabilizer muscles to hold balance.
-
Seat with back support: Usually has a backrest to support your spine, which helps limit unnecessary arching.
-
Adjustable handles and seat height: To align the start position with your shoulder joint so that the handles are at about shoulder level.
The machine version is particularly good for beginners, those recovering from injury, or people who want to isolate the shoulders without worrying too much about balance or coordination.
How To Use the Shoulder Press Machine: Proper Form & Technique
Using the shoulder press machine safely and effectively depends on good setup and precise execution. Poor form reduces benefit and increases risk. Here are detailed steps plus technique tips:
Adjust the seat height
Set the seat so the handles are at or slightly below shoulder height when your arms are bent. Your elbows should be at about shoulder level — not too high (which can cause strain) and not too low.
Sit correctly with proper posture
- Back firmly against the support pad.
- Feet flat on the floor, hip-width apart.
- Maintain a neutral spine; avoid arching your lower back. Engage your core to stabilize your torso.
Grip the handles properly
Hands should be roughly shoulder-width apart, palms facing forward (or per the machine’s design). Wrists should stay in line with forearms. Avoid letting wrists bend or sag.
Perform the press
Press upwards in a controlled motion. Extend arms nearly straight — but don’t forcefully lock out your elbows, because full lockout can stress joints. At the top, ideally the arms are overhead or slightly forward depending on machine design.
Lower with control
Don’t let the weight drop; bring handles down in a controlled motion toward shoulder level. Maintain stability. This eccentric portion is as important for muscle activation and safety as the concentric (lifting) part.
Breathing
Inhale as you lower, exhale as you push up. Keeping breathing steady can help maintain core stability.
Technique variations / adjustments:
- If you feel discomfort in the rotator cuff, adjust the angle: slightly in front of your body rather than directly lateral or behind neck.
- Ensure shoulders are depressed (pulled down) and back, not rounded forward or shrugged.
What Muscles the Shoulder Press Machine Works
Knowing which muscles are targeted helps you understand where strength gains will come and where to balance.
Primary muscles:
- Deltoids, especially anterior deltoid (front) and medial deltoid (middle). The machine press emphasizes those most.
- Triceps: As you extend the arms overhead, the triceps help with elbow extension.
Secondary muscles and stabilizers:
- Upper chest (clavicular pectoralis major) — assists in the pressing motion, particularly at the bottom phase.
- Trapezius (upper fibers) — helps stabilize the shoulder girdle.
- Core muscles (abdominals, lower back) — especially when seated without back support; they help control posture. Machine versions reduce the demand a bit, but still helpful to engage.
Benefits vs Drawbacks of the Shoulder Press Machine
As with any exercise modality, the shoulder press machine has trade-offs. Knowing both sides helps you integrate it effectively in your training.
Benefits:
- Safety and stability: The machine supports your back and guides the path of motion, which helps reduce risk of injury or misuse. Especially good for beginners or those with unstable shoulders.
- Isolation: Since stabilizing requirement is lower, you can focus more directly on working the shoulder muscles. Good for hypertrophy (muscle growth).
- Less fatigue from stabilizers: Because you don’t have to engage as many stabilizer muscles, the primary muscles can fatigue slower. That allows higher volume or sets.
- Consistent path helps technique: The fixed motion helps you maintain good form, minimizing jerky movements or risk from improper trajectory.
Drawbacks:
Limited stabilization work: You miss out on engaging stabilizer muscles as much, which could reduce overall shoulder girdle robustness. Free-weight pressing works more stabilizers.
Fixed path limits adaptability: The fixed motion may not match everyone’s natural joint anatomy, possibly causing discomfort or unnatural stress, especially if machine is poorly adjusted.
Potential for overloading joints: If you push too heavy or allow form to degrade (e.g. locking elbows, arching back), you can put strain on shoulders, rotator cuff, spine.
Less Functional for full-body integration: Because core and lower body involvement is reduced compared to standing press or free weights, the carryover to real-life movements may be lower.
Common Mistakes & How to Avoid Them
Even with the machine, mistakes are common. Here are typical errors and solutions:
| Mistake | Why It’s a Problem | Fix / How to Avoid |
|---|---|---|
| Seat too low or too high | Misalignment: handles start above or below shoulder level, causing strain on joint or reducing effective range of motion | Adjust seat so handles align with your mid-shoulder when elbows bent (about 90°). |
| Excessive lower back arching | Puts undue stress on lumbar spine; shifts load off shoulders | Brace core; ensure back pressed firmly against pad; avoid pushing chest too far up. |
| Locking out elbows forcefully | Puts stress on elbow joints and may compromise shoulder stability | Don’t lock elbow fully; leave a slight bend at top. |
| Using momentum (jerking or bouncing) | Reduces muscle activation; increases risk of injury | Lift and lower in controlled manner; pause briefly at top/bottom. |
| Shoulder shrugging / raising the shoulders | Overuses traps; reduces focus on deltoids; may compress structures near the collarbone | Depress shoulders (pull them down); focus on pushing through shoulders rather than shrugging. |
| Flared elbows too wide | Can cause shoulder impingement; puts more torque on shoulder joint | Keep elbows in a more forward or slightly in front alignment; avoid overly wide positions. |
Also avoid what is generally known as the behind-the-neck shoulder press on machines or otherwise: it forces a lot of external rotation and can stress rotator cuffs and shoulder joints.
Programming Tips: How to Include the Shoulder Press Machine in Your Workout
To maximize benefit and minimize risk, here’s how to program the shoulder press machine into your training plan:
Frequency: 1-2 times per week is usually sufficient, especially for well-trained individuals. Allow rest between sessions so shoulders can recover.
Sets & Reps: For strength: 3-5 sets of 4-8 reps with heavier weight (ensure form is solid). For hypertrophy: 3-4 sets of 8-15 reps. For muscular endurance: higher reps (15-20) with lighter loads.
Warm-up & mobility: Always begin with shoulder mobility drills, rotator cuff activation (external rotation, band pull-aparts), and warming up the upper back. Helps reduce risk of impingement.
Progress slowly: Increase weight gradually. Don’t sacrifice form just to lift heavier.
Use machine variety and free weights: Combine machine shoulder press with free-weight presses (dumbbells, barbells) and other shoulder movements (laterals, rear delts, face pulls) for balanced development.
Adjust grip & machine settings: If possible, change handle widths or angles to reduce joint discomfort and hit muscles differently. Some machines allow single-arm or alternating arm press which can help fix strength imbalances.
Why the Shoulder Press Machine Matters: Benefits for Strength, Fitness, and Longevity
Understanding the role of the shoulder press machine in a fitness plan shows why so many trainers and lifters include it. Here are broader reasons:
- Injury prevention: By allowing more controlled movement and less demand on stabilizer muscles, especially early on or during rehab, you can reduce risk of shoulder injuries.
- Progressive overload with safety: It offers a safer way to increase overhead strength progressively, particularly when you might not have a spotter.
- Muscular aesthetics & posture: Developing strong shoulders, especially the medial and anterior deltoids, improves upper-body shape; also contributes to better shoulder posture, which helps reduce slumping or rounded shoulders.
- Functional carryover: Pressing overhead is a movement used in daily life (lifting things overhead, putting things on high shelves). The machine press helps build overhead pressing strength in a safer, more controlled manner.
- Adaptability: For those with joint issues, injuries, or limited mobility, the shoulder press machine allows modifications (less range of motion, lighter weights) while still working the muscle.
Conclusion
The shoulder press machine is more than just a gym staple—it’s a tool that, when used with knowledge and care, offers excellent shoulder strength, stability, and growth, especially for those seeking safer, more guided overhead pressing. By mastering proper form, avoiding common errors, balancing machine work with other exercises, and programming intelligently, you can make the shoulder press machine a powerful asset in your training arsenal.
Next time you hit that machine, remember to adjust the seat, brace your core, control the weight, and press with purpose—not just with ego. Your shoulders, posture, and long-term fitness will thank you.


Veronica Mars Movie (2014): The Complete Guide, Plot, Cast, Kickstarter Record & Legacy

Eron Johnson: Biography, Net Worth, Antiques Empire and Everything You Need to Know

Eron Hodges Biography: Age, Career, Oregon State General Manager, Net Worth & Football Journey
-
 celebrity6 days ago
Eron Hodges Biography: Age, Career, Oregon State General Manager, Net Worth & Football Journey
-
 celebrity4 days ago
Eron Johnson: Biography, Net Worth, Antiques Empire and Everything You Need to Know
-

 celebrity6 days ago
Eron Gordon: Biography, Basketball Career, Family & Where He Is Now in 2026
-
 celebrity4 days ago
Veronica Mars Movie (2014): The Complete Guide, Plot, Cast, Kickstarter Record & Legacy