
Auto
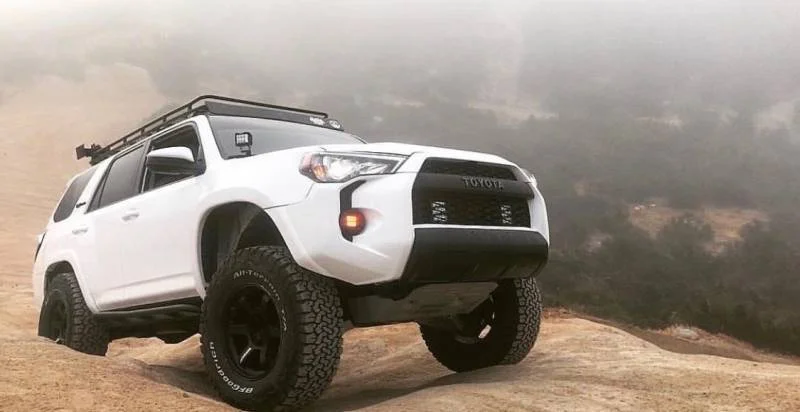
Toyota 4Runner Flare Upgrade
What Is a Flare Upgrade for a Toyota 4Runner?
Toyota 4Runner Flare Upgrade: A “flare upgrade” on a Toyota 4Runner commonly refers to installing fender flares / wheel arch flares / overfenders or wider flare extensions to the bodywork. These are attachments or body pieces that extend the wheel arch outward, providing additional clearance, visual width, and protection from debris.
Key objectives of a flare upgrade include:
-
Increased tire coverage for larger tires or wheels with low offset
-
Protection of body panels (doors, rocker panels, quarter panels) from rocks, mud, and road spray
-
Aggressive / rugged aesthetics—giving the 4Runner a more off-road or overland look
-
Compliance with local laws regarding tire protrusion (many jurisdictions require tires to be covered)
-
Sometimes improved aerodynamics or debris deflection in off-road use
So in short: a flare upgrade is both a functional and stylistic enhancement for a 4Runner, especially for owners who lift their vehicle or put on wider wheels/tires.
Why Upgrade Flares on a 4Runner? Benefits & Motivations
Before committing, it’s good to understand the advantages (and motivations) for flare upgrades on a 4Runner.
✅ Functional Benefits
-
Allows for larger wheel / tire setups
If you upgrade to wider, more aggressive off-road tires, factory arches may not provide enough clearance. Flares give you more “room” so tires don’t rub. -
Body protection
When driving off-road, trails, gravel, or even street use, rocks, dirt, and debris can fling out and chip paint or dent body panels. Flares intercept many of these. -
Legal / regulatory compliance
In many regions, aftermarket wheels that stick out beyond the fender require coverage (so tires aren’t exposed). Flares help you stay street legal. -
Better spray / mud control
With flares, mud, water, and debris are less likely to be thrown onto the vehicle sides or onto following traffic.
🎨 Aesthetic / Styling Benefits
-
A flare upgrade can give a more aggressive, wider stance
-
It visually indicates off-road readiness / ruggedness
-
Many flares are paintable or color matched to the body, creating seamless custom looks
-
Flare styles (pocket flares, bolt-on flares, extended flares) let you express your personal design preference
Because the 4Runner is a popular overland / off-road platform, many owners choose flare upgrades as a high-impact visual mod that also supports performance upgrades like tires & lifts.
Types & Styles of Fender Flares for Toyota 4Runner
Not all flare upgrades are the same. Here are common flare styles / types available for the 4Runner, along with their pros and cons.
1. OEM-style (factory look) flares
These mimic the look of factory flares but with slightly greater coverage. They tend to be lower profile, subtle, and easier to integrate. They’re ideal if you want a clean, “stock +” look without going extreme.
2. Pocket / bolted flares
These are flares with recessed “pockets” or faux rivet details. They have a more muscular, aggressive aesthetic. Many aftermarket flare kits have bolt-on styling but use hidden fasteners or mounting behind.
3. Extended / wide flares / overfenders
These go significantly beyond stock width to allow wide tires, aggressive offsets, and large lift setups. They often require more robust mounting, possibly trimming or body modification.
4. No-drill / adhesive + bolt hybrid flares
Some kits are designed to install with minimal body modification, using adhesive tape (e.g. 3M trim tape) plus factory bolt holes. This is a good choice if you want to avoid cutting or permanent changes. E.g. a 2025 4Runner flare kit adds about 1 inch per corner and uses 3M tape plus OEM bolts.
5. Painted / color-matched vs raw / black finish
You can get flares pre-painted to match your vehicle, or in raw / matte black ABS / plastic, ready for you to paint or leave in contrast. For instance, Rough Country offers paint matched fender flares for 2025+ 4Runner in colors like matte black, wind chill pearl, red, etc.
6. OEM / factory flares (TRD Pro or manufacturer options)
Some trims (TRD Pro or special editions) come with factory extended flares; you may choose to swap those onto other trims. In forums, 2025 TRD Pro fender flare part numbers are shared (75085-35100, 75086-35100, etc.)
When choosing, consider:
-
How wide your wheel / tire setup is
-
Whether you want to avoid cutting or drilling
-
Aesthetics and whether you want paint matched
-
Durability (material, UV resistance, flex)
-
Mounting method and structural support
How to Choose & Plan Your 4Runner Flare Upgrade
Choosing the right flares involves a thoughtful process. Here are key factors to help you plan a successful upgrade.
🧮 Determine your wheel / tire specs & clearance
- Measure how far your wheels / tires stick out now (with current offset, width).
- Plan for future changes (if you intend to go bigger later).
- Ensure the flare gives enough gap to prevent rubbing during articulation, suspension travel, turning, etc.
🔍 Material quality, flexibility & durability
- Premium flares are made from ABS plastic, tri-blend plastic, polyurethane, Dura-Flex ABS, etc.
- Look for UV resistance, impact resistance, flexibility under cold/heat so they don’t crack.
- Some flares come with a warranty (for fading, cracking) — good sign of quality.
🏗 Mounting method & installation
- Kits that use OEM bolt points + adhesive vs ones that require cutting/drilling
- Check how mounting tabs / brackets are designed
- For aggressive / wider flares, sturdy mechanical support is more critical
- Some kits are truly bolt-on with no trimming required (e.g. some 2025 kits)
🎨 Finish options
- Pre-painted to match your 4Runner’s body color
- Matte black / satin black raw finish to leave or paint later
- Textured finish for rugged appearance
- Surface should be sandable / paintable if needed
🛠 Compatibility & trim considerations
- Some flares may not fit certain trims (e.g. TrailHunter, TRD Pro) because they already come with extended fenders. Rough Country notes their flares do not fit TrailHunter or TRD Pro trims.
- Ensure the flare kit is designed for your model year (4Runner generations differ).
- Account for wheel well liners, inner fenders, trim, bumpers around flare edges.
💰 Budget & cost considerations
- Price can vary widely depending on brand, materials, finish, and included hardware.
- Remember to budget for painting, hardware, labor (if not DIY), sealants, adhesives, etc.
- Cheaper kits may save cost but may warp, fade, or break over time.
🛞 Legal / registration considerations
- In some areas, tires protruding beyond fender flares may violate local laws — so the flare width must properly cover tire profile.
- Check your jurisdiction’s regulations on modifications and coverage.
With this planning, you can choose a flare upgrade that fits your performance goals, aesthetics, and long-term reliability.
Steps to Install 4Runner Flares & Best Practices
Here’s a general installation guide and best practices to install aftermarket flares on your Toyota 4Runner. Note: always follow the specific kit instructions.
1. Preparation & surface cleaning
- Remove factory flares (if any) by unscrewing fasteners, clips, trim pieces.
- Clean the mounting surface thoroughly — remove wax, dirt, grease, and use isopropyl alcohol or adhesion promoter.
- Mask off paintwork around edges to protect from scratches during install.
2. Dry-fit and alignment
- Test fit each flare, aligning mounting holes, edges, contours.
- Mark positions with tape or felt-tip markers.
- Ensure no interference with suspension, liner, wiring, or body seams.
3. Mounting hardware & adhesives
- Depending on the kit, attach flare tabs / brackets to the vehicle or flare.
- If adhesive / tape (e.g. 3M molding tape) is used, apply to the flare’s inner lip and press firmly with consistent pressure. For example, the 2025 4Runner flare kit from NYTOP uses 3M™ Super Strength Molding Tape + OEM bolts.
- Apply sealant if required for waterproofing and vibration damping.
4. Bolt-up & torque sequence
- Begin loosely installing all fasteners (or screws) so flares can shift/adjust.
- Once everything lines up, tighten hardware in a crossing pattern to evenly seat the flare.
- Do not overtighten plastic; torque to recommended values in manual.
5. Finishing touches
- Check all edges for gaps and ensure uniform flushness.
- Add edge trim or rubber seals if provided to protect paint and provide smooth interface.
- Reinstall any inner liners, trim panels, or splash shields removed earlier.
- Clean the flares and surrounding area, removing fingerprints or smudges.
6. Curing & settling
- If adhesive was used, avoid high-pressure washing for at least 24 hours (or as instructed).
- Inspect again after a few days of normal driving to ensure nothing has shifted or loosened.
If you’re not confident DIYing, many body shops or 4×4 specialty shops can handle flare installation professionally.
Costs, Common Pitfalls & Maintenance Tips
Upgrading flares is not without its potential issues and upkeep. Here are what to expect and how to avoid problems.
💸 Typical costs
- Basic raw ABS flare kits: moderate cost
- Color-matched / premium material kits: higher cost
- Add-ons: painting, primer, sealing, hardware, labor
- Professional installation can significantly increase total cost
- Always budget ~10-20% extra than kit cost for consumables, adjustments, and unforeseen issues
⚠️ Common pitfalls & what to watch out for
- Poor adhesion / tape failure — if mounting surfaces not perfectly prepped, adhesive may lift over time
- Rubbing or interference during turning, suspension travel — especially if clearance hasn’t been tested
- Mismatched flare size / contour — result in gaps, misalignment, or ill-fitting appearance
- UV damage / fading / cracking — low-quality plastic can degrade over time
- Paint chipping or finish mismatch — if paint matched poorly or not correctly prepped
- Interference with body trim, fender liners, wiring — some kits require trimming or re-routing
- Legal / registration issues — if flares don’t sufficiently cover tires as per local law
🔧 Maintenance & care tips
- Wash flares gently — avoid harsh chemicals that degrade adhesives
- Periodically check tightness of hardware and inspect for lifting edges
- Wax or seal plastic flares using plastic-safe sealants to protect against UV
- Touch up chips or scratches early to prevent further damage
- In cold climates, inspect for cracking or separation due to thermal cycling
- If a part gets damaged, repair quickly before spreading stress
With proper care, high-quality flares can last for many years without major issues.
Conclusion
Upgrading to flares on a Toyota 4Runner is a smart way to combine function and style. Whether you want to run wider tires, protect your body panels, or simply give your rig a more aggressive presence, the flare upgrade is a popular and effective mod in the 4Runner community.
To recap:
- Flare upgrades extend the wheel arch to provide more clearance, coverage, and aesthetics
- The benefits include tire fitment flexibility, body protection, mud/rock defense, and styling
- There are various styles — OEM look, pocket / bolted, extended / wide, adhesive vs bolt, painted vs raw
- Choosing wisely means considering your tire setup, mounting method, material quality, and finish
- Installation involves careful prep, dry fitting, adhesive/bolts, alignment, and finishing
- Costs range depending on brand, finish, and labor, and you must avoid common mistakes like poor adhesion, interference, or mismatched models
- Maintenance is key: periodic checks, cleaning, tightening, protecting from UV
If you tell me your 4Runner’s year, trim, and your wheel/tire setup goals, I can help you pick the ideal flare kit and even send you a step-by-step install guide specific to your rig.

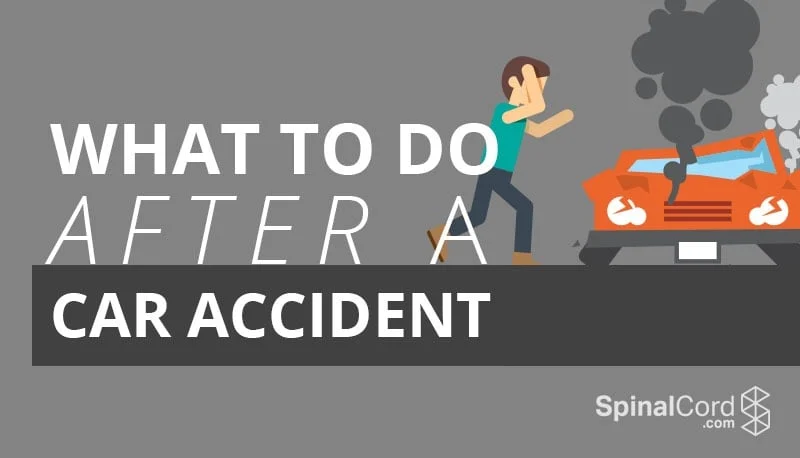
Car accidents come without warning, leaving you to deal with damage, injuries, and confusion. What you do after an accident is crucial for your safety, legal rights, and financial recovery. This guide covers the key steps to take—from the immediate moments at the scene to long-term recovery—ensuring you get the protection and compensation you deserve.
Take Immediate Action at the Scene
The first few minutes after an accident are critical for everyone’s safety and well-being. Your priority should always be ensuring that you and others involved are safe and that proper authorities are notified.
Check for Injuries
Your health and the health of others should be your top concern. Take a moment to assess yourself for any pain, discomfort, or obvious injuries. Check on your passengers and, if safely possible, the occupants of other vehicles involved. Remember that adrenaline can mask pain and injuries, so even if you feel fine initially, you may still be hurt.
If anyone appears to be seriously injured, avoid moving them unless they’re in immediate danger. Moving someone with a spinal injury could cause permanent damage. Instead, keep them calm and still until emergency medical services arrive.
Call the Police
Even if the accident seems minor, contact law enforcement. Many states require police reports for any accident involving injuries, significant property damage, or disputes about fault. The responding officer will create an official accident report, which can be invaluable when dealing with insurance companies and potential legal proceedings.
When speaking with the police, stick to the facts about what happened. Avoid speculating about fault or admitting blame, even if you think you might have caused the accident. Let the investigation determine fault based on evidence and witness statements.
Exchange Information
Collect essential information from all drivers involved in the accident. This includes full names, contact numbers, driver’s license numbers, insurance company names and policy numbers, and vehicle information such as make, model, year, and license plate numbers.
If there are passengers in any of the vehicles, get their names and contact information as well. They may serve as important witnesses later. Be cooperative, but remember that you’re not required to discuss the details of how the accident occurred with other drivers.
Document the Scene Thoroughly
Proper documentation can make or break your insurance claim and any potential legal case. The more evidence you gather at the scene, the better protected you’ll be later.
Taking Photos
Use your smartphone to take comprehensive photos of the accident scene. Capture images of all vehicles involved from multiple angles, showing both the damage and the overall scene. Take photos of the street, traffic signs, signals, skid marks, and any debris.
Don’t forget to photograph the license plates of all vehicles involved and take pictures of the other drivers’ insurance cards and driver’s licenses (with their permission). If there are any visible injuries, document those as well, though be respectful when asking.
Gathering Witness Statements
If there are witnesses to the accident, politely ask for their contact information and a brief statement about what they saw. Independent witnesses can provide crucial testimony that supports your version of events, especially if the other driver disputes fault.
Write down or record their statements while the details are fresh in their minds. Even seemingly minor details could become important later, so encourage witnesses to be as specific as possible about what they observed.
Deal with Insurance Companies
Navigating the insurance process after an accident can be complex, but understanding your coverage and responsibilities will help ensure you receive fair treatment.
Notifying Your Insurer
Contact your insurance company as soon as possible after the accident, ideally within 24 hours. Many insurers have 24-hour claim reporting hotlines for this purpose. Provide them with all the information you gathered at the scene and be honest about what happened.
Your insurance company will assign a claims adjuster to your case who will investigate the accident, assess damages, and determine coverage. Keep detailed records of all communications with your insurer, including dates, times, and the names of representatives you speak with.
Understanding Coverage
Review your insurance policy to understand what types of coverage you have and what your deductibles are. Common types of coverage include liability (for damage you cause to others), collision (for damage to your vehicle), comprehensive (for non-collision damage), and personal injury protection or medical payments coverage.
If the other driver was at fault, their liability insurance should cover your damages. However, if they’re uninsured or underinsured, your coverage may need to step in, depending on your policy terms.
Seek Proper Medical Attention
Even if you feel fine immediately after the accident, it’s important to prioritize your health and seek appropriate medical care.
Seeking Treatment
Some injuries, particularly soft tissue injuries like whiplash, may not manifest symptoms until hours or days after the accident. Consider seeing a doctor within a day or two of the accident, even if you don’t feel injured. This creates a medical record linking any later-discovered injuries to the accident.
If you experience any pain, discomfort, headaches, dizziness, or other symptoms in the days following the accident, don’t ignore them. Prompt medical attention not only protects your health but also creates important documentation for insurance and legal purposes.
Documenting Injuries
Keep detailed records of all medical treatment related to the accident. This includes hospital visits, doctor appointments, physical therapy sessions, prescription medications, and any medical devices or equipment you need.
Save all medical bills, receipts, and documentation. Take photos of visible injuries and keep a journal documenting your pain levels, how the injuries affect your daily activities, and your recovery progress. This documentation will be crucial if you need to seek compensation for your medical expenses and pain and suffering.
Consider Legal Implications
Depending on the severity of the accident and the extent of your damages, you may need to consider legal action to protect your rights and ensure fair compensation.
Consulting an Attorney
If you’ve suffered significant injuries, face substantial medical bills, or encounter resistance from insurance companies, consulting with a law firm for personal injury cases, such as those in Utah, can be invaluable. Personal injury attorneys understand the complexities of accident law and can help you navigate the legal system.
Many personal injury attorneys work on a contingency fee basis, meaning you don’t pay unless they win your case. This arrangement makes legal representation accessible even when you’re dealing with medical expenses and lost income from the accident.
Understanding Your Rights
You have the right to fair compensation for damages resulting from another driver’s negligence. This can include medical expenses, lost wages, property damage, pain and suffering, and future medical costs related to your injuries.
However, there are time limits, called statutes of limitations, for filing personal injury claims. These vary by state but are typically between one and three years from the date of the accident. Don’t wait too long to explore your legal options, as waiting could jeopardize your right to compensation.
Focus on Long-Term Recovery
Recovery from a car accident often extends far beyond the initial medical treatment. Taking a comprehensive approach to your recovery will help ensure the best possible outcome.
Physical Therapy
If your doctor recommends physical therapy, take it seriously and attend all scheduled sessions. Physical therapy can help restore strength, flexibility, and function while reducing long-term complications from your injuries.
Follow your physical therapist’s instructions for home exercises and lifestyle modifications. Consistency with your treatment plan not only supports your recovery but also demonstrates to insurance companies and courts that you’re taking your injuries seriously.
Mental Health Support
Car accidents can be traumatic experiences that affect your mental health long after your physical injuries heal. It’s common to experience anxiety about driving, depression, or post-traumatic stress symptoms after a serious accident.
Don’t hesitate to seek counseling or therapy if you’re struggling emotionally after an accident. Mental health treatment is a legitimate part of accident recovery, and the costs may be covered by insurance or included in any settlement you receive.
Prevent Future Accidents
While you can’t control every factor on the road, there are steps you can take to reduce your risk of future accidents.
Defensive Driving
Practice defensive driving techniques such as maintaining safe following distances, staying alert to your surroundings, and anticipating potential hazards. Avoid distractions like texting or eating while driving, and never drive under the influence of alcohol or drugs.
Consider taking a defensive driving course, especially if it’s been a while since you learned to drive. Many insurance companies offer discounts for completing these courses.
Vehicle Maintenance
Keep your vehicle in good working condition with regular maintenance. Ensure your brakes, tires, lights, and other safety systems are functioning properly. Address any mechanical issues promptly—a small problem can quickly become a safety hazard.
Regular maintenance not only keeps you safer on the road but can also help you avoid being found partially at fault for an accident due to vehicle defects.
Conclusion
Car accidents can be life-changing, but taking the right steps after can help. Seek medical care, document everything, and get legal advice if needed. Recovery takes time—be patient, follow expert guidance, and use available resources like medical, legal, or emotional support. Don’t navigate this alone—consult professionals to protect your rights and help you return to normalcy.

Life on the road as a truck driver is filled with long hours, ever-changing weather, and tight deadlines—but safety must always come first. Whether you’re a new driver or a seasoned hauler, staying alert and well-prepared can make the difference between a smooth journey and a dangerous situation. This survival guide is packed with essential safety tips to help every trucker stay road-ready and protected, no matter what the journey brings.
1. Pre-Trip Inspections: Start Smart
Every safe trip begins before the engine even starts. A thorough pre-trip inspection is your first line of defense. Look for issues with tires, brakes, lights, mirrors, and fluid levels. Check your load to ensure it’s properly secured and balanced. DOT regulations require these inspections, but beyond compliance, they give you peace of mind.
Tip: Use a standardized checklist to avoid missing anything important. Apps or printed guides can help streamline this step.
2. Plan Your Route and Know Your Stops
Planning ahead is a huge part of staying safe. Know your route, potential weather conditions, rest areas, weigh stations, and fueling spots. Modern GPS systems tailored for truck drivers help avoid low bridges, weight-restricted roads, and unexpected detours.
Bonus: Identify safe places to stop in case of an emergency. Always avoid pulling off on the shoulder unless absolutely necessary.
3. Rest and Fatigue Management
Fatigue is one of the most dangerous risks on the road. Even the most experienced drivers can be affected by drowsiness, especially during night shifts or long hauls.
- Follow Hours-of-Service (HOS) regulations strictly.
- Take regular breaks and short naps if needed.
- Get quality sleep before each shift.
- Eat light meals—heavy food can make you sluggish.
Watch out for: Frequent yawning, heavy eyes, drifting between lanes, or missing road signs—these are warning signs of fatigue.
4. Drive Defensively, Not Aggressively
As a truck driver, you’re navigating highways alongside smaller, more maneuverable vehicles—which makes defensive driving not just important, but essential. This is especially true in high-traffic zones or during adverse weather conditions.
- Keep a safe following distance at all times.
- Signal well in advance and always double-check your blind spots.
- Eliminate distractions like phone use or eating behind the wheel.
- Stay composed, even when others around you drive recklessly.
While you can’t control the actions of other drivers, you can choose how you respond. Prioritizing safety not only protects lives but also shields you from legal complications. If you are involved in a collision, speaking with a Salt Lake City truck accident lawyer can help you understand your rights and navigate the legal process with confidence.
5. Adapt to Weather and Road Conditions
Bad weather increases risks. Rain, snow, fog, and high winds affect visibility and traction. Adjust your speed, increase following distance, and use lights appropriately.
Winter Tips:
- Keep chains, an emergency shovel, and extra warm clothing in your cab.
- Use anti-gel additives in freezing temperatures.
Rain and Fog Tips:
- Turn on low-beam headlights.
- Avoid sudden stops or sharp turns.
Never feel pressured to drive in unsafe conditions. Communicate delays with dispatch if needed—safety always comes first.
6. Emergency Preparedness: What’s in Your Kit?
Every trucker should carry a well-stocked emergency kit. Essentials include:
- First-aid supplies
- Flashlight and batteries
- Reflective triangles or flares
- Non-perishable food and bottled water
- A basic tool kit
- Phone charger and power bank
- Fire extinguisher
- Extra clothing and blankets
Regularly check and replenish your kit so you’re never caught unprepared.
7. Stay Healthy on the Road
Good health supports sharp focus and fast reaction times. While trucking schedules can be demanding, taking care of your body pays off.
- Drink plenty of water to stay hydrated.
- Choose healthier food options when possible.
- Stretch during stops to prevent stiffness and muscle strain.
- Avoid relying on caffeine or sugar to stay awake.
Even a few lifestyle changes can improve your overall alertness and long-term well-being.
8. Stay Connected, Stay Informed
Keep in regular contact with dispatch and check weather, traffic, and road condition updates. Many apps offer real-time information to help truckers avoid hazards.
Don’t forget: CB radios still have value. In many situations, they provide quick communication and assistance when cellular service is unreliable.
Final Thoughts: Safety is the True Destination
Truck driving is more than just moving cargo—it’s about arriving safely, every time. Staying proactive, alert, and prepared makes the road safer for you and everyone you share it with. From inspections to rest, route planning to emergency readiness, this survival guide is your companion for safer trucking.
So gear up, stay sharp, and remember—every mile you drive safely is a win.


Veronica Mars Movie (2014): The Complete Guide, Plot, Cast, Kickstarter Record & Legacy

Eron Johnson: Biography, Net Worth, Antiques Empire and Everything You Need to Know

Eron Hodges Biography: Age, Career, Oregon State General Manager, Net Worth & Football Journey
-
 celebrity1 week ago
Eron Hodges Biography: Age, Career, Oregon State General Manager, Net Worth & Football Journey
-
 celebrity5 days ago
Eron Johnson: Biography, Net Worth, Antiques Empire and Everything You Need to Know
-
 celebrity5 days ago
Veronica Mars Movie (2014): The Complete Guide, Plot, Cast, Kickstarter Record & Legacy
-

 celebrity1 week ago
Eron Gordon: Biography, Basketball Career, Family & Where He Is Now in 2026